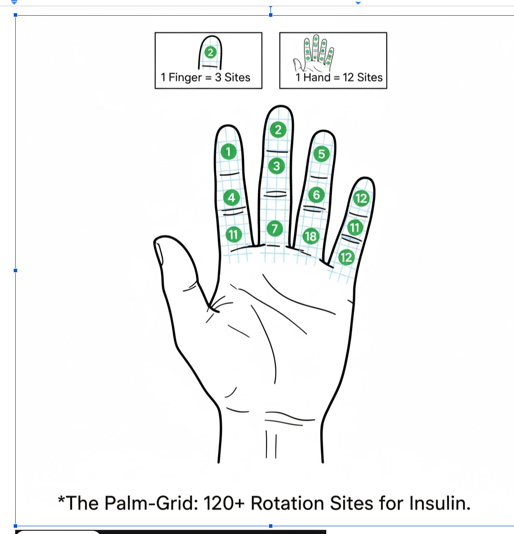
Using the same spot repeatedly can cause lumps or thickened tissue (lipohypertrophy), which may make insulin absorption less predictable. Move each injection at least one finger-width from the previous spot and follow a simple pattern so no area is overused.
Recommended injection areas
Insulin is injected into the fatty layer under the skin. Common areas are the abdomen, outer thighs, backs or outer areas of the upper arms, and upper outer buttocks. Use only the areas recommended by your diabetes-care team.
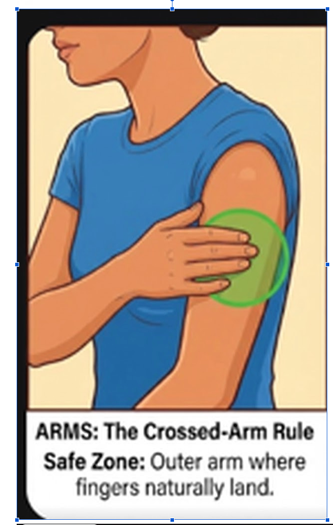
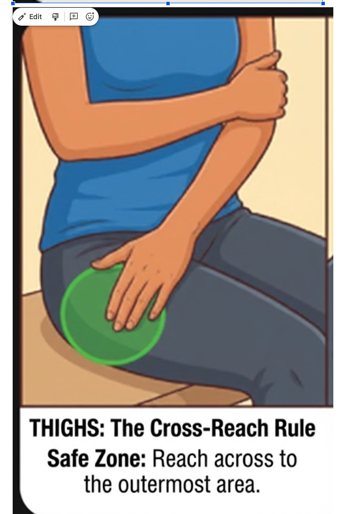
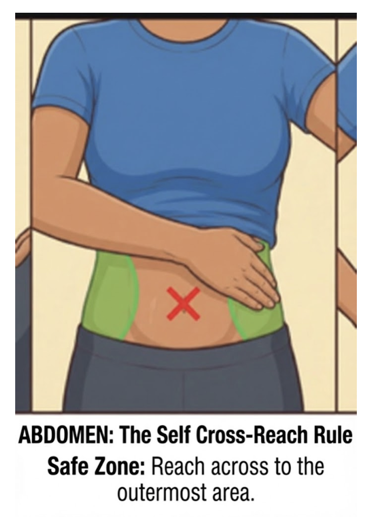
Simple reach rules
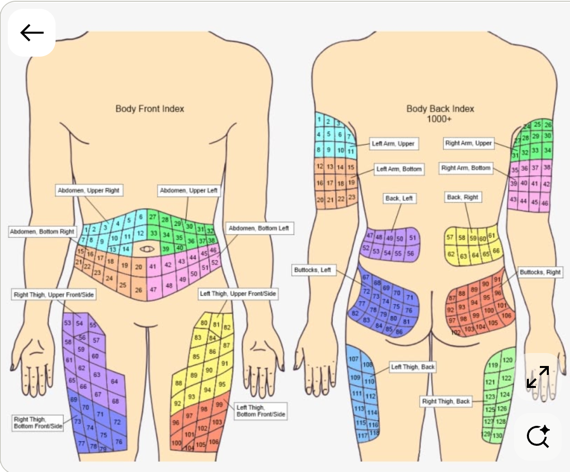
Use a rotation grid
Four safety reminders
- Keep injections at least one finger-width apart and record the last area used.
- Do not inject into a lump, scar, bruise, inflamed skin or an area that feels unusually firm.
- Rotate within the same general body area at similar times of day; changing areas can alter absorption speed.
- Have your injection sites checked during diabetes visits, especially if glucose readings become unpredictable.
इन्सुलिन इंजेक्शन लगाने की जगहें और रोटेशन
इन्सुलिन का इंजेक्शन हमेशा त्वचा के ठीक नीचे मौजूद फैट (वसा) वाली परत (Subcutaneous tissue) में लगाया जाता है। इसे लगाने की मुख्य रूप से चार जगहें होती हैं:
1. पेट (Abdomen)
यह इन्सुलिन लगाने की सबसे अच्छी और सबसे आम जगह मानी जाती है क्योंकि यहाँ से इन्सुलिन शरीर में तेज़ी से और एक समान रूप से अवशोषित (absorb) होता है।
कैसे लगाएँ: नाभि (Belly button) से कम से कम 5 सेमी (लगभग 2 इंच) की दूरी छोड़कर पेट पर इंजेक्शन लगाएँ। पसलियों के ठीक नीचे और जांघ की शुरुआत के बीच के हिस्से का इस्तेमाल करें।
2. जांघ (Thigh)
पेट के बाद जांघों का इस्तेमाल सबसे ज़्यादा किया जाता है। यहाँ इन्सुलिन का अवशोषण पेट के मुकाबले थोड़ा धीमा हो सकता है।
कैसे लगाएँ: जांघ के सामने और बाहरी हिस्से (Front and outer thigh) पर इंजेक्शन लगाएँ। घुटने के बहुत करीब या जांघ के अंदरूनी हिस्से में लगाने से बचें।
3. ऊपरी बांह (Upper Arm)
बांह पर इंजेक्शन लगाना भी एक विकल्प है, लेकिन यहाँ खुद से इंजेक्शन लगाना थोड़ा मुश्किल हो सकता है।
कैसे लगाएँ: ऊपरी बांह के पीछे वाले हिस्से (Triceps के पास), जहाँ पर्याप्त फैट हो, वहाँ इंजेक्शन लगाया जाता है।
4. कूल्हे (Buttocks)
यहाँ इन्सुलिन का अवशोषण अन्य जगहों की तुलना में धीमा हो सकता है। यह स्थान छोटे बच्चों या पर्याप्त वसा वाले मरीजों में उपयोगी हो सकता है।
कैसे लगाएँ: कूल्हे के ऊपरी और बाहरी हिस्से (Upper outer area) में इंजेक्शन लगाएँ।
ध्यान रखने योग्य ज़रूरी बातें (Important Tips)
- जगह बदलते रहें (Site Rotation): एक ही जगह पर बार-बार इंजेक्शन न लगाएँ। इससे त्वचा के नीचे सख्त गांठें (Lipohypertrophy) बनने का खतरा कम होता है। एक ही हिस्से, जैसे पेट, का इस्तेमाल करते समय हर नया इंजेक्शन पिछली जगह से कम से कम एक उंगली की चौड़ाई दूर लगाएँ।
- सफाई: इंजेक्शन लगाने से पहले जगह और हाथ साफ होने चाहिए।
- इंजेक्शन का तरीका: छोटी पेन नीडल आमतौर पर त्वचा पर 90 डिग्री के कोण पर लगाई जाती है। त्वचा को पकड़ना या 45 डिग्री का कोण इस्तेमाल करना नीडल की लंबाई और शरीर की बनावट पर निर्भर करता है—इसकी सही तकनीक अपने डॉक्टर या डायबिटीज़ एजुकेटर से सीखें।
- निशान या सूजन: जहाँ चोट, सूजन, लाल निशान, सख्त गांठ या दर्द हो, वहाँ इन्सुलिन न लगाएँ।